Welcome to the SAWS Blog
The blog is designed to share news about SAWS and its members. It is part of a broader communications effort including social media to build the brand of the organization and encourage people to join and be active in woodworking.
Putting a personal face on the organization, its members and the woodworking they do, encourages the mentorship and camaraderie that has been the foundation of the organization over many years.
We welcome member contributions for the blog and below is some background on how to do that. We also encourage members to share these blog articles with their personal or business networks. The more they are used and shared the more value SAWS gets from the effort.
Some Basic Rules of Operation
The blog is designed to be an enjoyable, manageable undertaking.
How to submit: If you have an idea or a completed article, send us an email and we will let you know our thoughts on approach and timing. We expect this to be a simple and easy going approach and we just want to avoid obvious issues such as having two members doing an article on the same topic, or figuring out best timing for the article to appear etc.
Length and type of article: There are no hard and fast rules but in general we want to keep articles fairly short and the pace brisk. Photos and illustrations that are owned by the contributor are welcome. Please don’t reproduce copyrighted material. A good rule of thumb for article length is under 500 words. But a blog entry can also be one or more photos with captions or descriptive. Visuals should be good quality and digital format. Please include some background on yourself as author as an attachment to your article.
Sample story types for member contributions: This is mostly wide open. Things you have built, tools you have used, courses you have taken, working tips and design thoughts, member success stories. As the blog grows with more entries over time, hopefully ideas for topics and article approaches will be generated.
Building respect: Online forums can sometime disintegrate into debating forums. We do not want that here. Treat people with respect in writing and comments. A good rule is no political comments. Ensure humor is respectful and that all postings are inclusive -- family, gender and age friendly.
Copyright: The copyright for articles and photos remain with the contributor. However, articles provided may be used elsewhere by SAWS. By providing the article to SAWS or agreeing to an interview, the author is providing SAWS with authority to use the material.
Links to social media, other SAWS communications efforts: Articles provided to the blog will also be linked into the SAWS social media plan and may be used in other SAWS tools such as the newsletter.
Commercial activity: This blog is not a forum for generating commercial activity. While some of that may occur as part of SAWS sponsorship or general activities, we do not want these articles to be about promotion of specific products or programs. We will not use links to commercial websites. However we expect to actively encourage woodworking activities in Western Canada.
Oversight: SAWS communications activities are overseen by a group of members. If we have questions we default to the judgment of this group for answers. A SAWS representative will review all articles for appropriate language and approach. We may do basic editing to correct obvious problems and add a headline if one is not provided, but we will not edit aggressively without writer approval. We reserve the right to refuse material deemed not appropriate, and to adjust content already posted or remove it entirely if that is recommended by our group.
How to Post an Article to the Website
This section is intended for members who are helping to post new News Blog articles to the website. There are a number of steps required and fields that need to be filled out in order for the new article to display properly and to automatically email to members and post to social media.
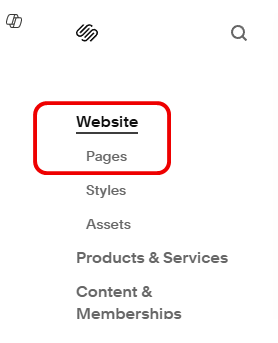
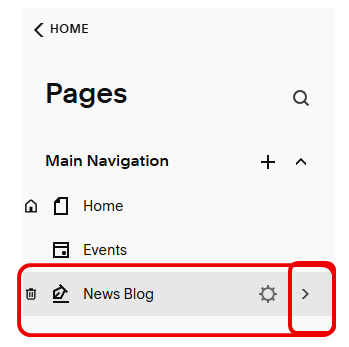
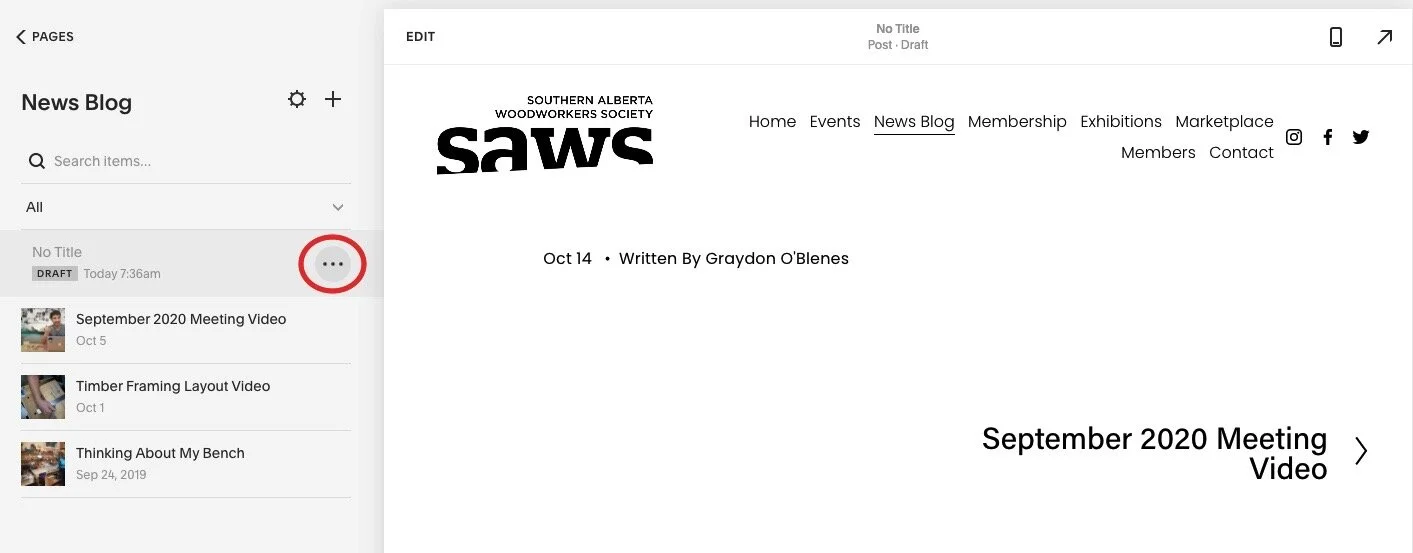
Find the menu: Log into SquareSpace and navigate to to the News Blog page. From the Home page, go to Website > Pages. Then under News Blog, click on the > arrow.
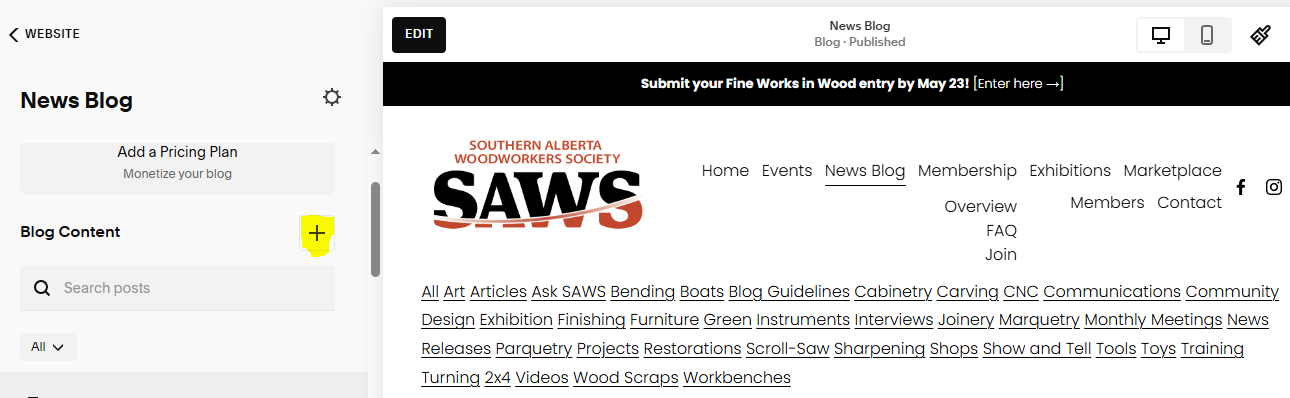
Create a post: Click the + to add a new post OR you can go into an existing post and DUPLICATE it. This has the advantage of picking up backend settings such as member password or location.
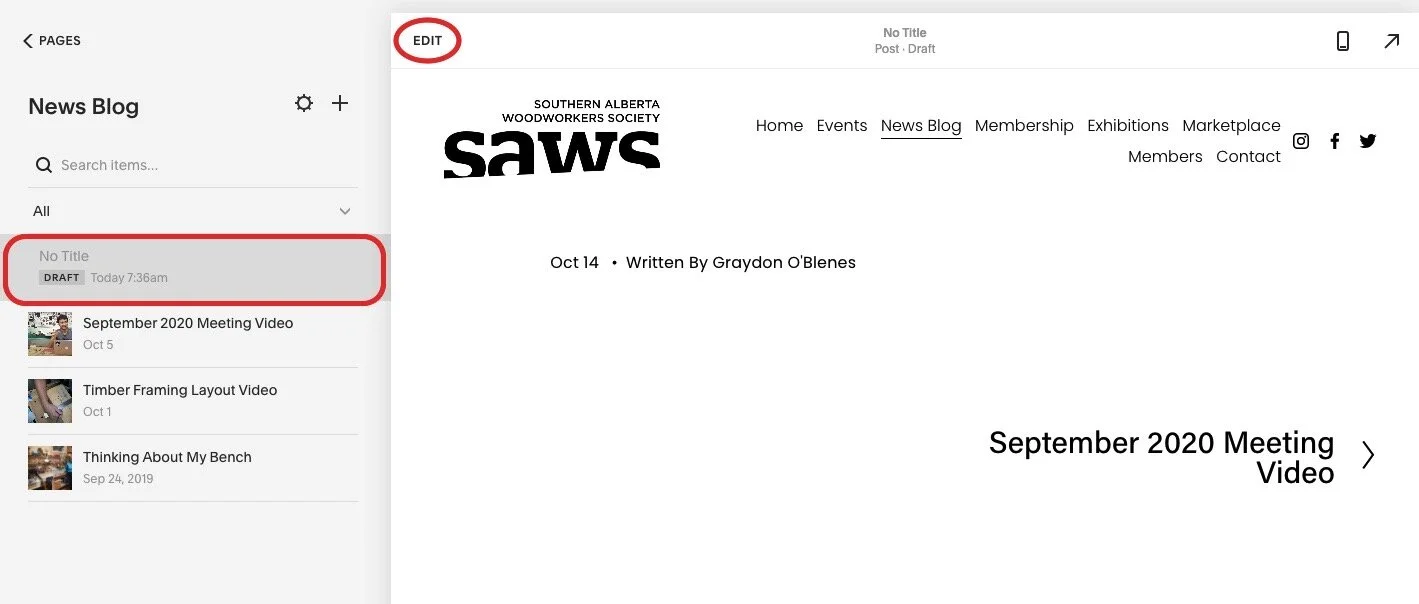
A new blank post will appear at the top of the list below the +. The new article will be in draft status. It will not be visible to visitors to the website until published. If the new page fills the screen, click on the BACK arrow to return to showing the menu.
NOTE Create date vs publish date >> When you create the article, it puts todays date on the byline (at the top of the article next to Written by. You may actually publish it several days later. If you want the publish date to appear as the later date, when you change the status to Published or Scheduled, select the date. This changes the date on the byline. Usually the create date doesn’t matter but it does for News Releases.
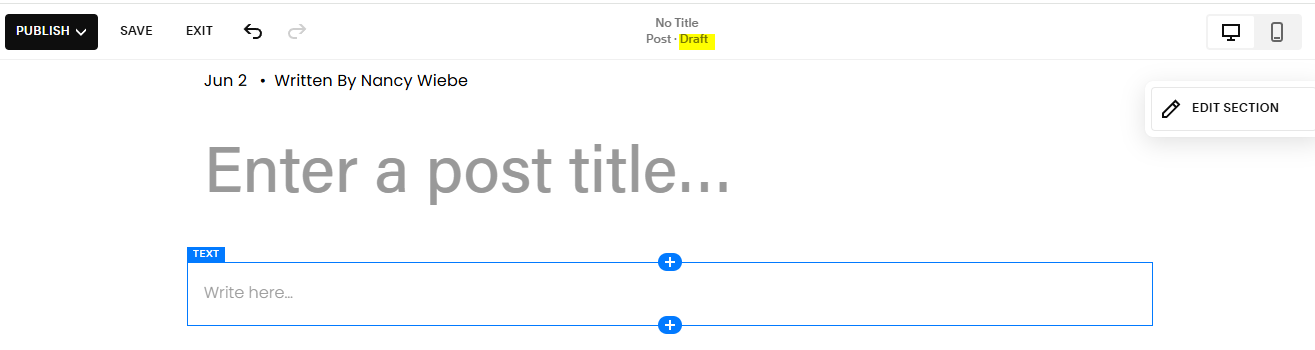
Add blog title and content: Make the title descriptive and SHORT! Note the DRAFT status.
For a Meeting post blog, enter the title in a larger font (e.g., header). There is no “body” text. It always has a Youtube link to the video (entered in Options).
For an article, use the content provided by the requestor and enter in the TEXT field.
BE SURE to click on the phone and web site icons to check how the blog content will appear on both devices. You may need to adjust placement or text size or whatever doesn’t look right.
SAVE after entering. It’s still in DRAFT status until published.
To get to the Settings menu, return to the main menu by clicking on EXIT. The DRAFT blog post will be listed at the top of the blog post list.

Settings Menu: Click the three dots next to the new blank post to get to the Settings page. The setup is pretty similar to an Event.
Typically we use the following menu items:
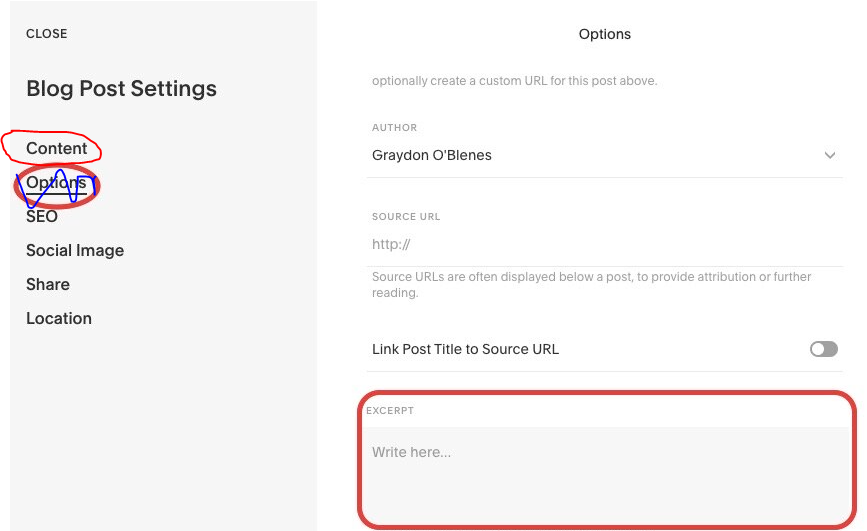
Content: Image (Thumbnail picture), Excerpt, Author, URL link to the meeting video.
Options: Status, Tags. Ignore the other options.
Tags: On Blog Post Settings page> OPTIONS > TAGS. Click on the right arrow to enter the search and filter tags for the new post. We are using the standardized list of tags shown below. Check the Blogs page for the most recent list. Reach out to the webmaster if you would like to add a new tag to the list.
In the Tags field, enter the first few letters to display the dropdown list. Then click on the tag(s) you want. You can add multiple tags or remove one. SAVE and return to the Settings menu.
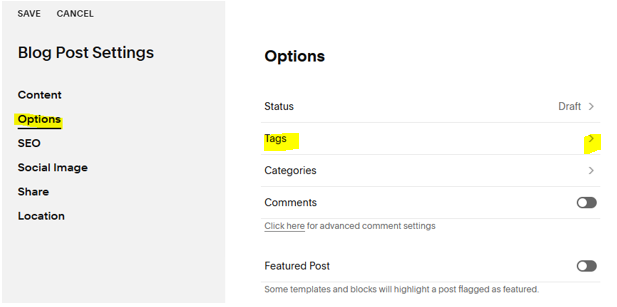

Tags appear in a dropdown. Add one at a time.
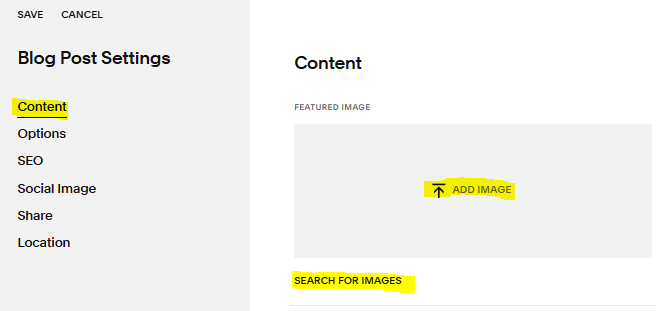
Thumbnail Image: Appears as the main picture in the blog list. NOTE: The Blog page automatically displays the published blog post entry in the blog list. No need to create a separate entry like the Events page.
From the Blog Settings page, select Content > Thumbnail Image, then upload or drag and drop the thumbnail image into the box. Or SEARCH FOR IMAGES in the Asset library already uploaded.
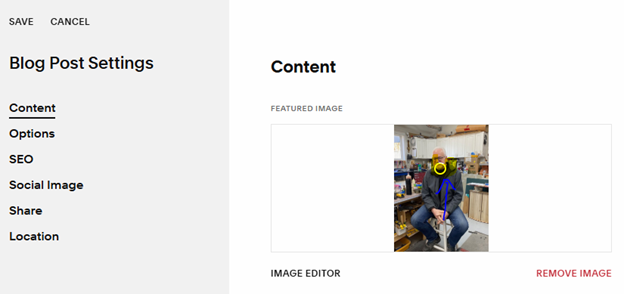
PICTURE ORIENTATION: The blog list displays the picture in LANDSCAPE format. If the thumbnail picture is in portrait format, some of the picture display will be chopped off. You need to change the picture to display in Landscape and adjust the picture to display properly. There are 2 ways to do this:
1) adjust the focus point in the picture or
2) use the Image Editor to “convert” to Landscape format.
1) In Settings > Content > thumbnail picture, move the white circle (shows here as yellow) up in the picture. This will bring the centre of the picture to the “middle” when in landscape mode. Return to the main menu to check the Draft block post in the menu list to see what it looks like. You can continue to fiddle with or do #2
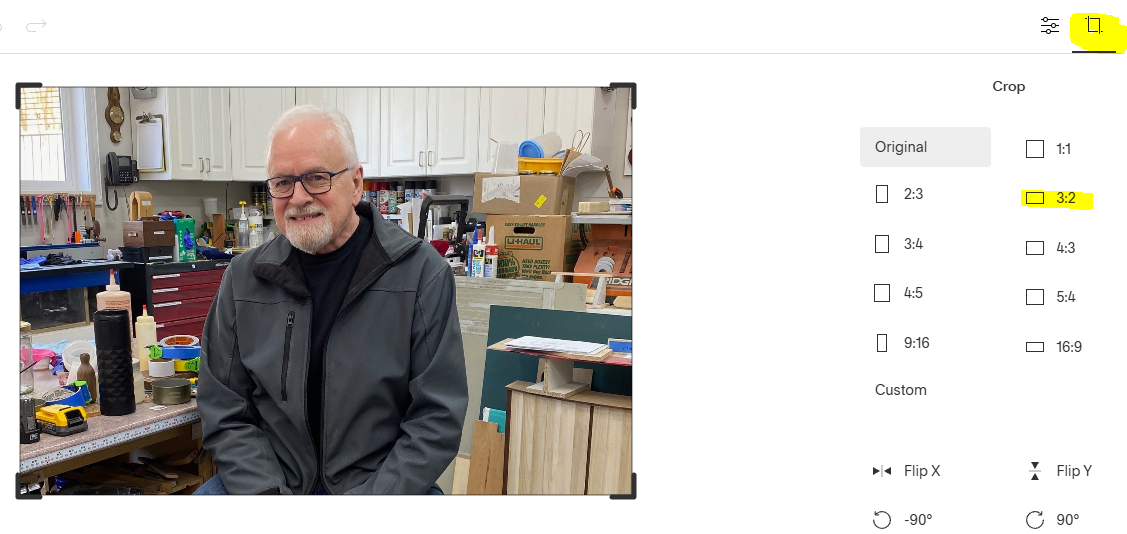
2) Alternatively, click on the Image Editor button located at the bottom left of the image. Click on the CROP option. in the right column, select landscape shape 3:2. Adjust the crop handles as needed. SAVE the image. Now the picture is in Landscape mode and will display better in the Blog thumbnail.
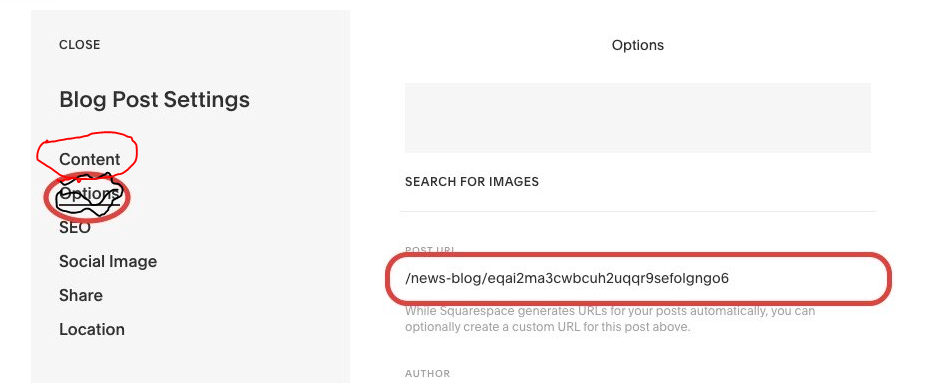
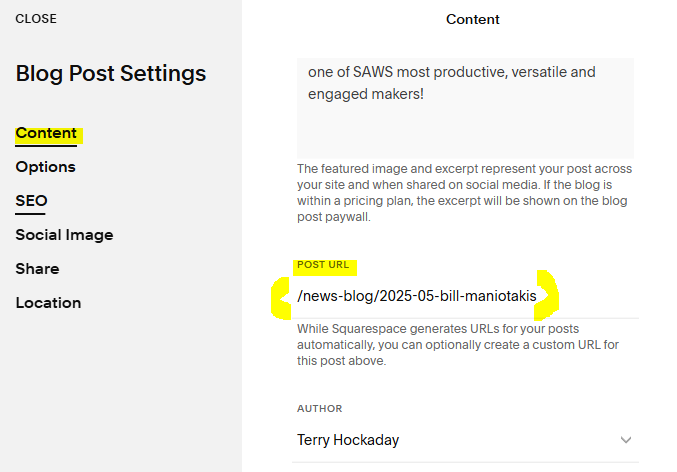
Post URL: Select Settings > Content. Delete the default URL and update the Post URL. We are trying to stick to the following format
URL Format: /news-blog/YYYY-MM-title-title
URL Example: /news-blog/2020-09-green-woodworking
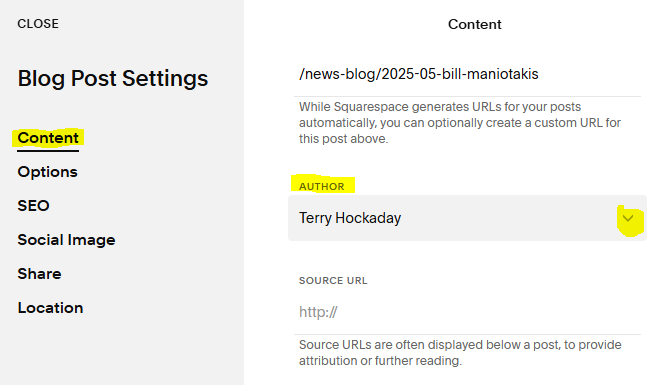
Author: Select Options on the left of the settings page then select the author on the right. If you don’t see the author listed, reach out to the Webmaster to add them.
Excerpt: Select Settings > Content and enter the Excerpt text on the right. The Excerpt will display below the thumbnail image on the Home and News Blog pages. Take it from the source document or ask the author to provide a short blurb.
Edit the Post: Close the Settings page. Select the DRAFT blank post on the left then click Edit at the top of the page.
Repeat from above text…
Title: You can add the post title when creating the post. If you duplicated an existing blog post, you will need to edit the title and text. You change it on the edit post page.
Body: Add the post text in the Write here text box. Text can be copied and pasted from other documents.
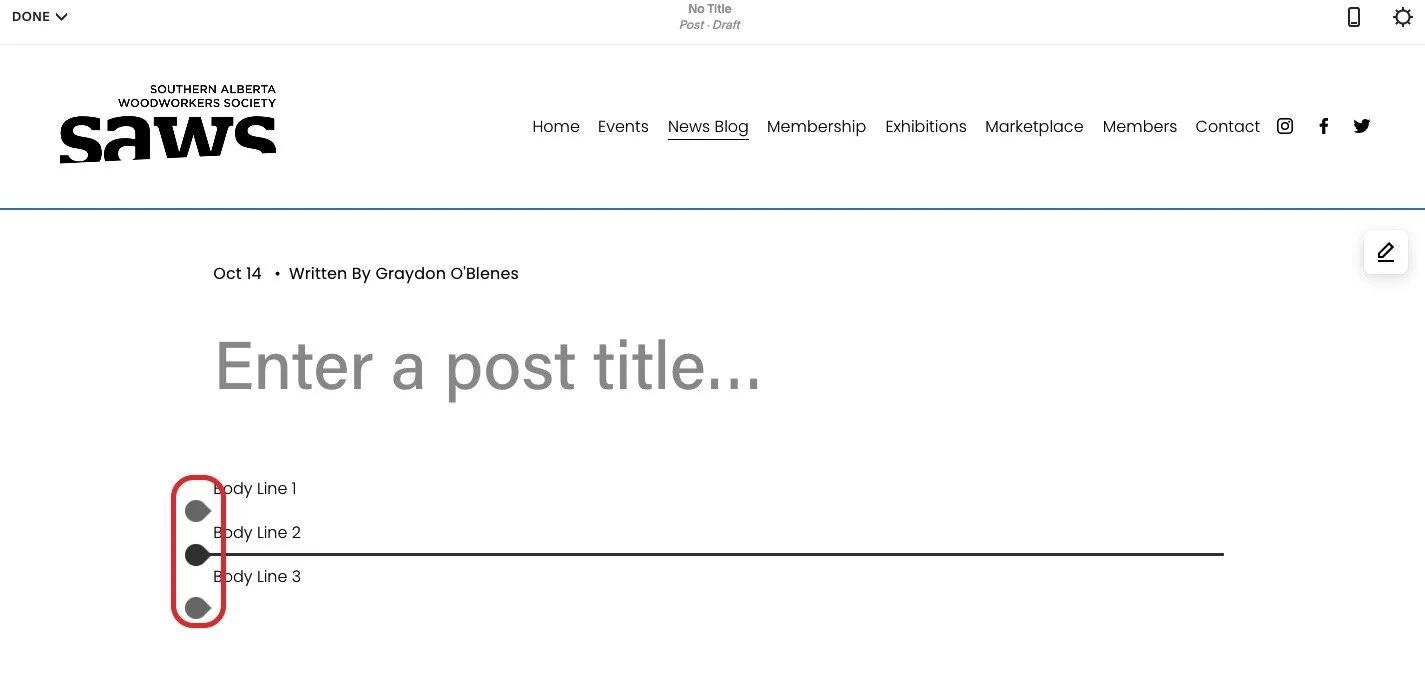
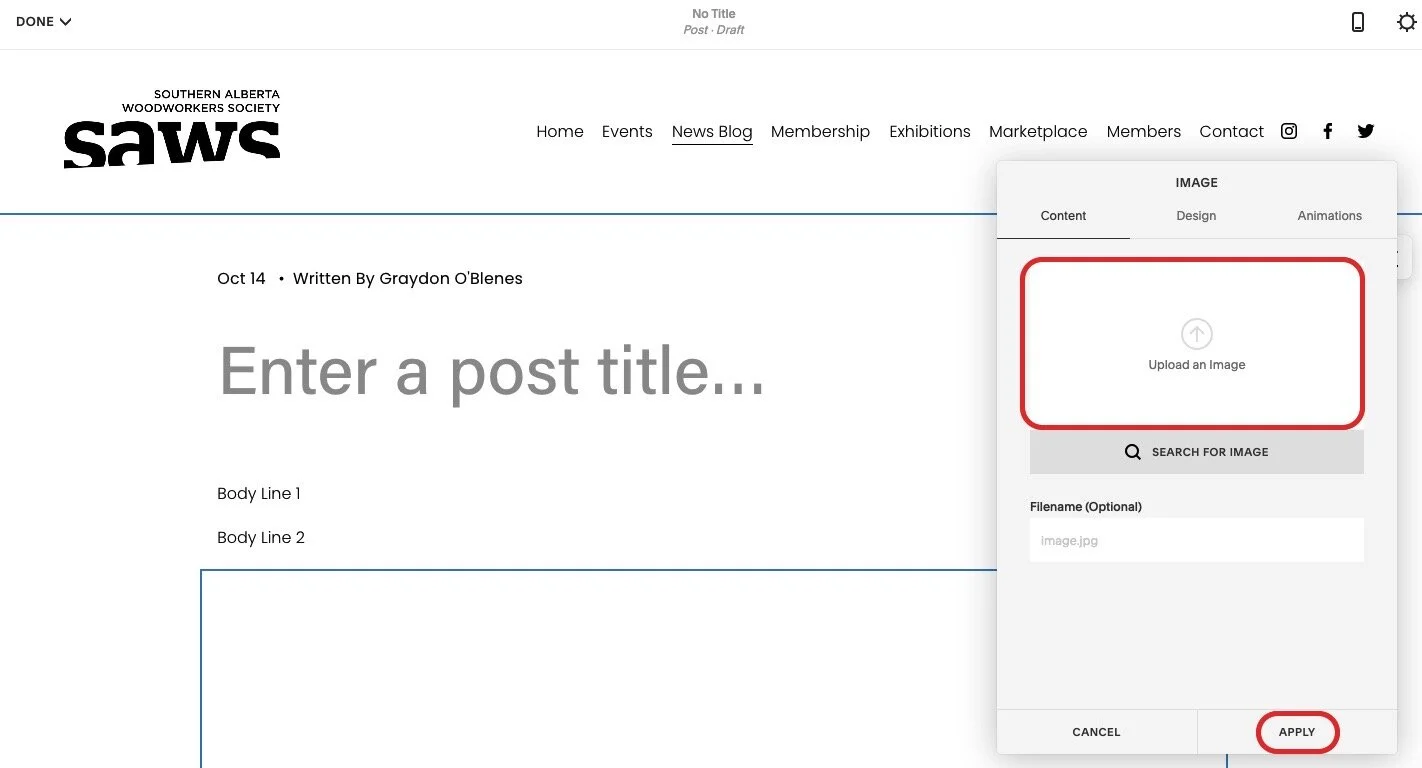
Add Pictures: When editing the body of the post, hold your mouse to the left of the text. At least one insertion point should appear. Click an insertion point to open the insert page.
Cont’d Add Pictures: Click the image icon to insert an image.
Cont’d Add Pictures: Drag and drop the image onto the image box then click apply.
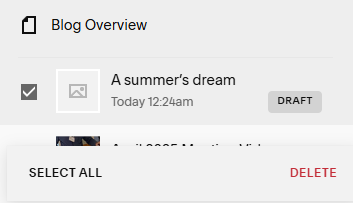
Save Changes/Delete post: To save the changes you have made to the post title and body, click Save. To delete a blog post, on the main Blog Overview menu, select the blog post. At the bottom of the screen, at the right hand side, click DELETE.
Of course, NEVER select Select All.
PUBLISHING the Blog post - there is a Publish/Schedule button at the top left of the blog post screen but typically we have someone review it first. The process is similar to an EVENTS posting. In practice, we don’t use “Needs Review” setting because the people reviewing it don’t have access to the backend. So we screenshot it and send to them for review. OR we publish it early in the morning (not Scheduled) so they have the day for review/corrections before it goes out in an email to the members after midnight.
<<not used - Needs Review: Once the blog is all setup, in SETTINGS > OPTIONS > STATUS, change the status to “Needs Review” and SAVE it.
Email the content creator to let them know they need to review it.

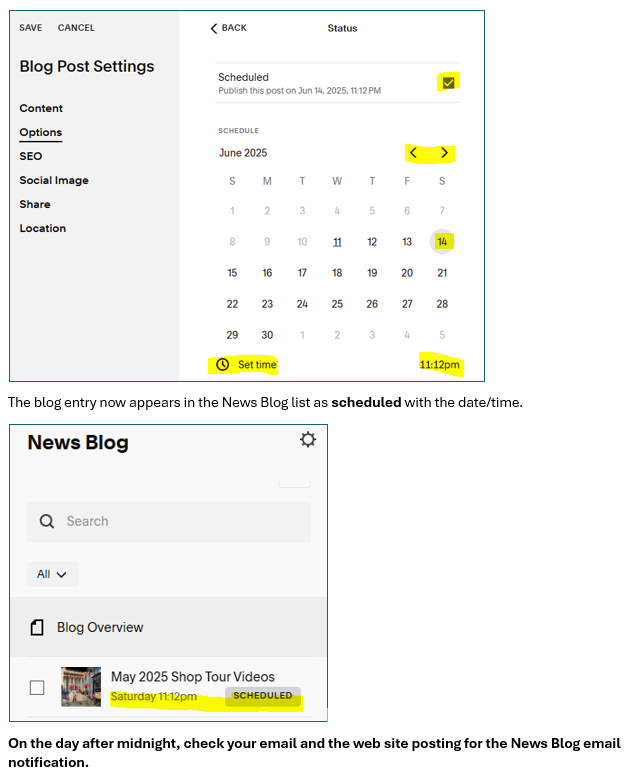
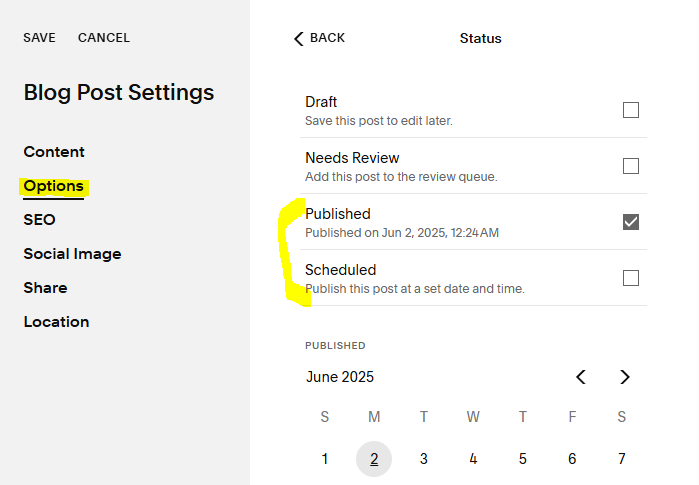
Publish: Once reviewed and approved, change the status to Publish Now or Schedule it. If Scheduled, the entry will appear in the Blog list as SCHEDULED with the date and time.
If using Publish Now and you want the creation date in the byline to be the publish date, select a date in the calendar which appears lower on the screen and a time.
If doing same day review (they should be advised beforehand), it’s good to publish in the morning so reviewers have time to make any corrections/changes. They generally don’t have backend access so review can be a bit “on the fly”.
Distribution: The email app MailChimp checks for new entries at midnight. If there is a new one, after midnight, it will email the members and publish the blog entry on the News Blog section and Home page of the web site.
SCHEDULE a publish date/time.
Click on Scheduled checkbox. Then below, click on a date. Below that, enter a time. SAVE!